
Ever wondered how more than one application is deployed to the same machine, and how traffic is routed to the corresponding applications? Keep reading to find out.
Introduction
Goals
By the end of the article, you’ll understand
- What a Reverse Proxy is?
- What NGINX is?
- How does NGINX help in managing multiple applications?
- How to leverage NGINX as a Reverse Proxy?
Reverse Proxy
According to Wikipedia, a reverse proxy is a type of proxy server that retrieves resources on behalf of a client from one or more servers. These resources are then returned to the client, appearing as if they originated from the server itself.
Refer to this article to better understand what Reverse Proxies are.
NGINX
We will be using NGINX as a Reverse Proxy. According to Wikipedia,
NGINX is a web server that can be used as a reverse proxy, load balancer, mail proxy, and HTTP cache. The software was created by Igor Sysoev and was publicly released in 2004. Nginx is a free and open-source software, released under the terms of the 2-clause BSD license. A large fraction of web servers use NGINX, often as a load balancer.
Some other examples Reverse Proxies available are:
Reverse Proxy Example
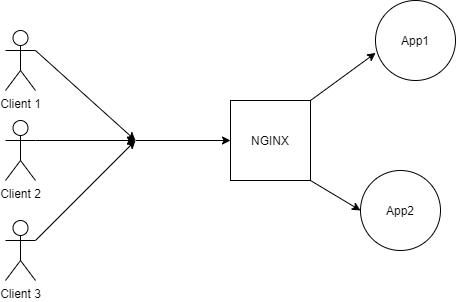
This is an example of an architecture, where two apps are running in the background, but the clients have no idea about them. The clients only know about NGINX which acts as a reverse proxy that sends the request to the appropriate application.
Now that you have a broader idea of what we are about to build, let’s jump right in!
Aim
- Deploy two applications and have them managed by NGINX.
Setup & Pre-Requisites:
- For this example, we have two sample Express Applications. One can have any kind of application running on different ports.
NOTE: Do not run your application on Port 80 or 443. We will explaining later why this must not be done.
Refer the official ExpressJS documentation for help getting started.
- We have installed NGINX on our local machine, but the same could be done on any Virtual Machine where the applications are expected to be deployed.
Here is the documentation on how to install NGINX on your machine.
Step 1: Start two apps running in different ports
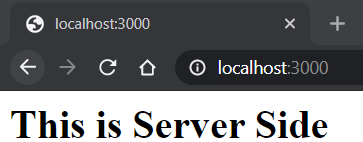
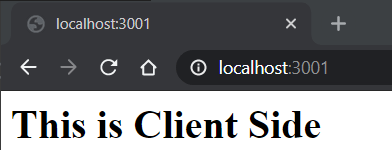
As we’ve mentioned earlier, we’ve got two Node.js Apps running on two different ports as shown below.
Server app running on Port 3000
Client app running on Port 3001
Now that we have our apps up and running, we don’t want our users to use these applications by typing their PORTS explicitly, so we need to map it with something that is more human-readable.
In this example, we will be using subdomains to distinguish between them. Again one is free to use whichever element is suitable as per requirements.
Another example could be a particular route like domain/client and domain/server. The only condition for the distinguishing element is to follow a valid URL regular expression. To learn about Regex you can click here.
Step 2: Add DNS records
This is the part where one would add the DNS records in their DNS management dashboard. If you are running Nginx locally, you can skip this step.
The general DNS Configurations would be something like:
- Server app mapped to the server.domain
- Client app mapped to the client.domain
My Localhost Config, in this case, would be:
- Server mapped to server.localhost
- Client mapped to client.localhost
There are two standard protocols HTTP and HTTPS. The default port for HTTP is 80 and HTTPS is 443. The reason we must not run our applications on these ports is because our NGINX server is running on these two ports. All the requests the client makes would either be redirected to port 80 or 443 from where it would be redirected internally to the corresponding application.
Step 3 - Configure NGINX at 80 for HTTP and 443 for HTTPS
Now that we have our apps running and our DNS records ready. We can start configuring our NGINX Reverse Proxy to make it all work.
By default, the configuration file is named nginx.conf and placed in the directory /usr/local/nginx/conf, /etc/nginx, or /usr/local/etc/nginx for Linux and Debian Based systems.
On Windows, the file is placed inside the installation folder, nginx/conf/nginx.conf.
Add these configurations inside the HTTP block.
Step 3.1 - HTTP
server { listen 80; server_name server.domain; location / { proxy_pass "http://localhost:3000" ; } } server { listen 80; server_name client.domain; location / { proxy_pass "http://localhost:3001" ; } }
Step 3.2 - HTTPS
server { listen 443 ssl http2; listen [::]:443 ssl http2; server_name server.domain; location / { proxy_pass "http://localhost:3000/"; } ssl_certificate <location of SSL certificate>; ssl_certificate_key <location of SSL certificate Key>; } server { listen 443 ssl http2; listen [::]:443 ssl http2; server_name client.domain; location / { proxy_pass "http://localhost:3001/"; } ssl_certificate <location of SSL certificate>; ssl_certificate_key <location of SSL certificate Key>; }
NOTE: These are the minimum configurations required to successfully implement NGINX for reverse proxying. Feel free to explore other config parameters as well.
Make sure to change the domain name to your domain. For a SSL Certificate and Key, you can obtain them from your SSL provider.
If you don’t have one, use this free service LetsEncrypt.
Follow their documentation to get free SSL instantly!
Step 4 - Save and Restart
After editing, save your changes. Use the sudo nginx -t command to test your changes before actually reloading NGINX. It is good practice do this to make sure your server won’t crash, if there were any errors in your config file.
Once you get a message that the test is successful, you can go ahead and restart NGINX.
Use this command sudo nginx -s reload to restart NGINX.
Open the browser and enter the URLs to find your applications running on the corresponding URLs configured.
For the example above, the URLs are:
- client.localhost
- server.localhost
Important Note
Using NGINX secures your server because it routes the traffic internally. Instead of having to open up all of your ports, in this case 3000 and 3001, to the internet, just 80 and 443 will do the trick.
This is because all traffic passes through the secure NGINX server (like a gateway) and is redirected to the correct application. Using a reverse proxy like NGINX is more secure that opening up several ports for every application you deploy because of the increased risk a hacker will use an open port for malicious activity.
Conclusion
Here is the end result:


Congratulations! You did it! 🎉
In large systems, the system is highly dependent on the micro-services architecture where each service would be served by an application. In that case, managing multiple apps would be an essential skill to know.
The microservices architecture is discussed here in detail.
Hope this article helped you to manage those independently deployed applications as a whole with the help of NGINX as a reverse proxy.
Thanks for reading!
References
Peer Review Contributions by: Louise Findlay
About the author

Harish Ramesh Babu is a final year CS Undergrad at the National Institute of Technology, Rourkela, India. He gets really excited about new tech and the cool things you can build with it. Mostly you’ll find him working on web apps either for the campus or an opensource project with the
https://www.section.io/engineering-education/nginx-reverse-proxy/
'LINUX' 카테고리의 다른 글
| TCP 프록시 부하 분산 개요 (Proxy Network Load Balancing) (0) | 2021.07.14 |
|---|---|
| [Nginx] Nginx HTTP redirect 및 포트포워딩(Port Forwarding) 설정 (0) | 2021.07.14 |
| Accelerate to use Unix Php-fpm socket (0) | 2021.07.14 |
| Load Balance Setting in NginX (0) | 2021.07.12 |
| vi 사용법에서 찾은 문자열 이외의 것을 삭제하는 방법 (0) | 2020.12.22 |