
Arduino boards have built in support for serial communication on pins 0 and 1, but what if you need more serial ports? The SoftwareSerial Library has been developed to allow serial communication to take place on the other digital pins of your boards, using software to replicate the functionality of the hardwired RX and TX lines. This can be extremely helpful when the need arises to communicate with two serial enabled devices, or to talk with just one device while leaving the main serial port open for debugging purpose.
In the example below, digital pins 10 and 11 on your Arduino boards are used as virtual RX and TX serial lines. The virtual RX pin is set up to listen for anything coming in on via the main serial line, and to then echo that data out the virtual TX line. Conversely, anything received on the virtual RX is sent out over the hardware TX.
Hardware Required
- Arduino Board
Circuit
There is no circuit for this example. Make sure that your Arduino board is attached to your computer via USB to enable serial communication through the serial monitor window of the Arduino Software (IDE).

Schematics
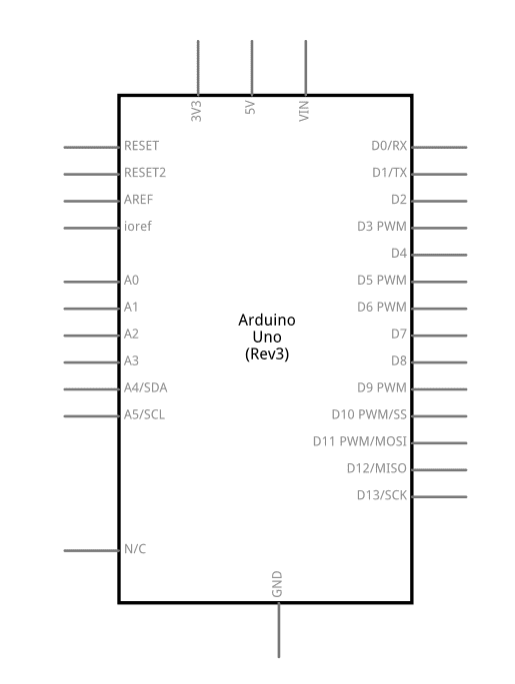
image developed using Fritzing. For more circuit examples, see the Fritzing project page
Code
/*
  Software serial multple serial test

 Receives from the hardware serial, sends to software serial.
 Receives from software serial, sends to hardware serial.

 The circuit:
 * RX is digital pin 2 (connect to TX of other device)
 * TX is digital pin 3 (connect to RX of other device)

 Note:
 Not all pins on the Mega and Mega 2560 support change interrupts,
 so only the following can be used for RX:
 10, 11, 12, 13, 50, 51, 52, 53, 62, 63, 64, 65, 66, 67, 68, 69

 Not all pins on the Leonardo support change interrupts,
 so only the following can be used for RX:
 8, 9, 10, 11, 14 (MISO), 15 (SCK), 16 (MOSI).

 created back in the mists of time
 modified 25 May 2012
 by Tom Igoe
 based on Mikal Hart's example

 This example code is in the public domain.

 */
#include <SoftwareSerial.h>

SoftwareSerial mySerial(2, 3); // RX, TX

void setup()
{
  // Open serial communications and wait for port to open:
  Serial.begin(115200);
  while (!Serial) {
    ; // wait for serial port to connect. Needed for Native USB only
  }


  Serial.println("Goodnight moon!");

  // set the data rate for the SoftwareSerial port
  mySerial.begin(38400);
  mySerial.println("Hello, world?");
}

void loop() // run over and over
{
  if (mySerial.available())
    Serial.write(mySerial.read());
  if (Serial.available())
    mySerial.write(Serial.read());
}
www.arduino.cc/en/Tutorial/LibraryExamples/SoftwareSerialExample
'홍익인간 프로젝트 > Arduino C' 카테고리의 다른 글
| PCF8574 I2C 확장보드로 CLCD, Text(텍스트) LCD 구동 (아두이노) (0) | 2020.12.25 |
|---|---|
| LiquidCrystal I2C - 3 Arguments Type (0) | 2020.12.25 |
| Arduino Uno TM1637 Display (0) | 2020.12.16 |
| Arduino Basic (0) | 2020.12.12 |
| u8g2 and screen oled i2c 128x64 (screen empty) and 128x128 soon (0) | 2020.12.07 |