그림1. LCD 1602(16X2) 4핀(I2C제어) 디스플레이 모듈

LCD 1602(16x2) 4핀(I2C제어) 디스플레이 모듈
LCD 중가장보편적이고초보자, 입문자분들이쉽게활용할수있는모델인LCD 1602 입니다. 또한 16핀의제어핀을LCD뒤에부착된I2C변환모듈을통해단 4개의핀으로제어가가능하도록쉽게만들어진모델입니다.

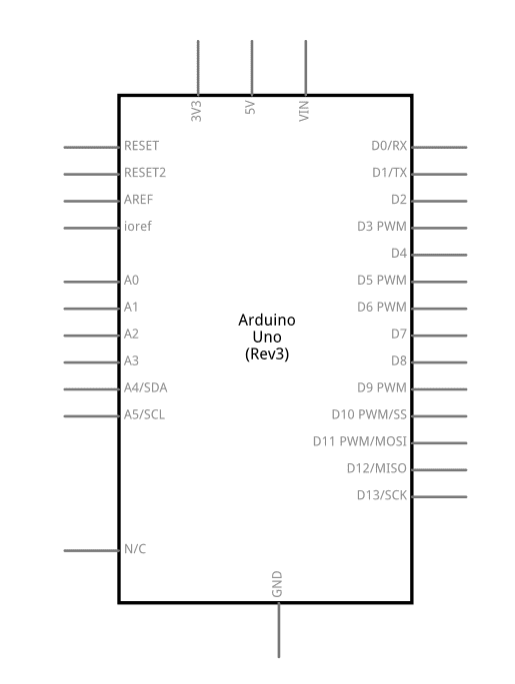
그림2. LCD 1602(16X2) 4핀(I2C제어) 디스플레이 모듈 핀맵
LCD 1602(16x2) 4핀(I2C)제어 디스플레이 모듈 보러가기(클릭)
1. LCD 1602(16x2) 4핀(I2C)제어 디스플레이 모듈
쉽게사용할수있는 4핀모델로I2C통신을통해제어되는 LCD 디스플레이모듈입니다. 해상도는16x2 케릭터(Character Type)입니다.
|
디스플레이 타입(Display Type) |
LCD(Liquid Crystal Display) |
|
동작 전압(Operating Volate) |
5V |
|
해상도(Resolution) |
16x2 |
|
I2C 주소 |
0x3F or 0x27 |
|
통신 인터페이스 |
I2C 통신 지원 |
|
백라이트 |
파란색(Blue) |
|
색상 |
흰색(White) |
|
소비전력 |
0.4W |
|
무게(Weight) |
3.2g |
|
크기(Size) |
82 x 35 x 18mm |
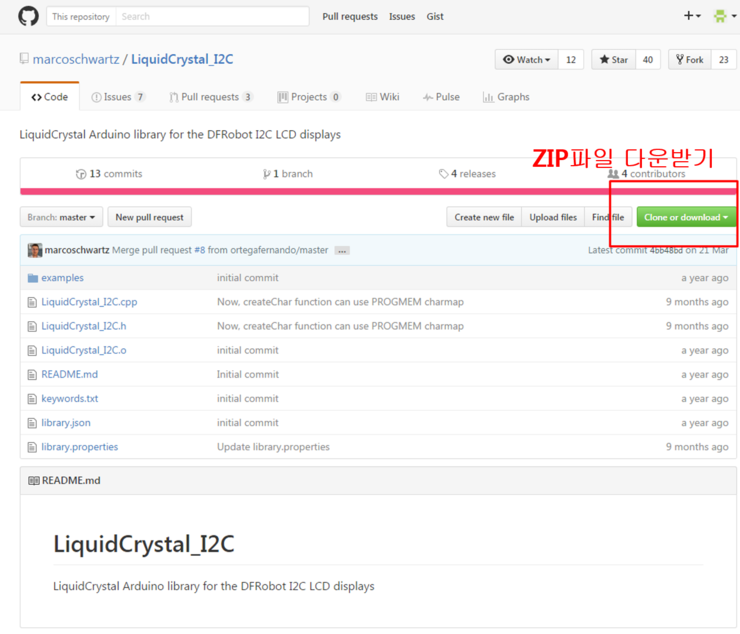
2. 라이브러리 다운로드 및 설치하기
LCD_I2C를사용하기위해서는라이브러리를다운받아야합니다. 다운경로는아래와같습니다.
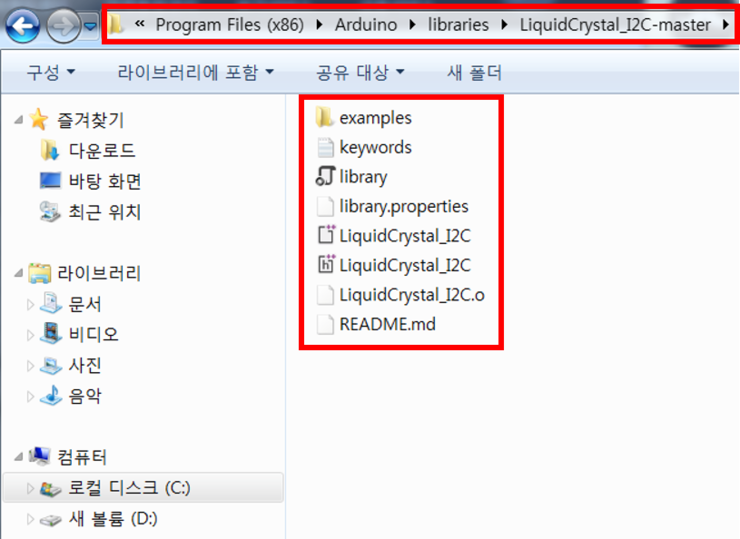
다운받은 ZIP파일안에들어있는폴더를내컴퓨터의아두이노 IDE 설치경로로들어가아래그림과같이라이브러리폴더아래에복사해넣어줍니다. 아두이노 IDE를껐다실행하면자동으로아래경로의라이브러리가포함되어실행됩니다.

※ 주의사항
- 라이브러리 추가시 경로설정을 정확하게 해야합니다.
아래 그림과 같이 ' C:\Program Files (x86)\Arduino\libraries\LiquidCrystal_I2C-master ' 경로 안에
example 폴더와 헤더파일을 포함한 파일들이 들어있어야 합니다.
(경로설정을 잘못하면 아두이노 IDE에서 컴파일 오류가 발생할 수 있습니다.)
3. 회로도 구성
아두이노우노와I2C 통신을구성해봅시다. 회로도는아래와같이연결해줍니다.
5V – VCC
GND – GND
A4 – SDA
A5 - SCL

4. 예제 따라하기1 – Hellow world
이제디스플레이해봅시다!!
예제소스는다음과같습니다.
#include <Wire.h> // i2C 통신을 위한 라이브러리
#include <LiquidCrystal_I2C.h> // LCD 1602 I2C용 라이브러리
LiquidCrystal_I2C lcd(0x3F,16,2); // 접근주소: 0x3F or 0x27
void setup()
{
lcd.init(); // LCD 초기화
// Print a message to the LCD.
lcd.backlight(); // 백라이트 켜기
lcd.setCursor(0,0); // 1번째, 1라인
lcd.print("Hello, world!");
lcd.setCursor(0,1); // 1번째, 2라인
lcd.print("Enjoy - Eduino");
}
void loop()
{
}
실제동작모습은다음과같습니다.

그림3. LCD 1602 4핀제어 디스플레이 모듈 실행 예제1. Hellow world
'홍익인간 프로젝트 > Arduino C' 카테고리의 다른 글
| u8g2setupcpp (0) | 2020.12.25 |
|---|---|
| PCF8574 I2C 확장보드로 CLCD, Text(텍스트) LCD 구동 (아두이노) (0) | 2020.12.25 |
| Software Serial Example (0) | 2020.12.16 |
| Arduino Uno TM1637 Display (0) | 2020.12.16 |
| Arduino Basic (0) | 2020.12.12 |