Arduino boards have built in support for serial communication on pins 0 and 1, but what if you need more serial ports? TheSoftwareSerial Libraryhas been developed to allow serial communication to take place on the other digital pins of your boards, using software to replicate the functionality of the hardwired RX and TX lines. This can be extremely helpful when the need arises to communicate with two serial enabled devices, or to talk with just one device while leaving the main serial port open for debugging purpose.
In the example below, digital pins 10 and 11 on your Arduino boards are used as virtual RX and TX serial lines. The virtual RX pin is set up to listen for anything coming in on via the main serial line, and to then echo that data out the virtual TX line. Conversely, anything received on the virtual RX is sent out over the hardware TX.
Hardware Required
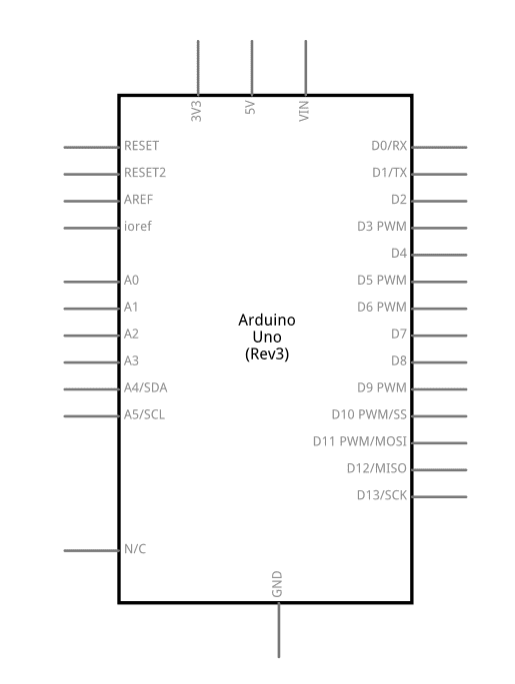
Arduino Board
Circuit
There is no circuit for this example. Make sure that your Arduino board is attached to your computer via USB to enable serial communication through the serial monitor window of the Arduino Software (IDE).
/*
  Software serial multple serial test

 Receives from the hardware serial, sends to software serial.
 Receives from software serial, sends to hardware serial.

 The circuit:
 * RX is digital pin 2 (connect to TX of other device)
 * TX is digital pin 3 (connect to RX of other device)

 Note:
 Not all pins on the Mega and Mega 2560 support change interrupts,
 so only the following can be used for RX:
 10, 11, 12, 13, 50, 51, 52, 53, 62, 63, 64, 65, 66, 67, 68, 69

 Not all pins on the Leonardo support change interrupts,
 so only the following can be used for RX:
 8, 9, 10, 11, 14 (MISO), 15 (SCK), 16 (MOSI).

 created back in the mists of time
 modified 25 May 2012
 by Tom Igoe
 based on Mikal Hart's example

 This example code is in the public domain.

 */
#include <SoftwareSerial.h>

SoftwareSerial mySerial(2, 3); // RX, TX

void setup()
{
  // Open serial communications and wait for port to open:
  Serial.begin(115200);
  while (!Serial) {
    ; // wait for serial port to connect. Needed for Native USB only
  }


  Serial.println("Goodnight moon!");

  // set the data rate for the SoftwareSerial port
  mySerial.begin(38400);
  mySerial.println("Hello, world?");
}

void loop() // run over and over
{
  if (mySerial.available())
    Serial.write(mySerial.read());
  if (Serial.available())
    mySerial.write(Serial.read());
}
In this blog post, we will see the C program to convert Hexadecimal to Decimal. In the interview, people ask the below questions,
How will you convert hexadecimal to decimal value?
Write a C program to convert hexadecimal number system value to decimal number system?
Implement logic to convert a hexadecimal number to a decimal number system?
Get a hexadecimal number from the user and convert it to its decimal equivalent?
Examples:
Input :67
Output :103
Input :512
Output :1298
Input: 123
Output: 291
We need to know the decimal and hexadecimal numbers before writing the C program to convert hexadecimal to the decimal.
The hexadecimal number system is a base 16 number system. The hexadecimal number is represented by 16 values i.e 0 1 2 3 4 5 6 7 8 9 A B C D E F.
The decimal number system is a base 10 number system. It uses 10 symbols to represent all numbers i.e. 0123456789
Logic to convert Hexadecimal to Decimal System:
We know that in hexadecimal number uses 16 symbols {0, 1, 2, 4, 5, 6, 7, 8, 9, A, B, C, D, E, F} to represent all numbers. Here, (A, B, C, D, E, F) represents (10, 11, 12, 13, 14, 15).
We need to run a loop from 0 to (buffer_length -1). The buffer_length is the length of the buffer which contains entered hexadecimal number.
To convert hex to decimal, we need to extract the digits of a given hexadecimal number from the buffer. At the time of extracting digits from the hexadecimal number, multiply the digit with the proper base (Power of 16) and add it to the variable “decimal”.
After ending the iteration, the variable “decimal” will store the resultant decimal number.
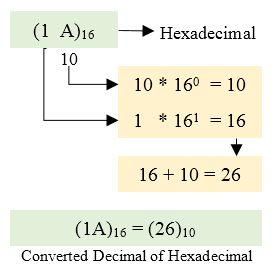
For Example: If the hexadecimal number is 1A. decimal = 1*(16^1) + 10*(16^0) = 26
Below diagram explains how to convert hexadecimal number ( 1AB ) to equivalent decimal value:
C Program to convert hexadecimal to decimal number system:
#include <stdio.h>
#include <math.h>
#include <string.h>
#define ARRAY_SIZE  20
int main()
{
    char hex[ARRAY_SIZE];
    long long decimal = 0, base = 1;
    int i = 0, value, length;
    /* Get hexadecimal value from user */
    printf("Enter hexadecimal number: ");
    fflush(stdin);
    fgets(hex,ARRAY_SIZE,stdin);
    length = strlen(hex);
    for(i = length--; i >= 0; i--)
    {
        if(hex[i] >= '0' && hex[i] <= '9')
        {
            decimal += (hex[i] - 48) * base;
            base *= 16;
        }
        else if(hex[i] >= 'A' && hex[i] <= 'F')
        {
            decimal += (hex[i] - 55) * base;
            base *= 16;
        }
        else if(hex[i] >= 'a' && hex[i] <= 'f')
        {
            decimal += (hex[i] - 87) * base;
            base *= 16;
        }
    }
    printf("\nHexadecimal number = %s", hex);
    printf("Decimal number = %lld\n", decimal);
    return 0;
}
Enter hexadecimal number: 1A
Hexadecimal number = 1A
Decimal number = 26