Withstanding an attack from a motivated hacker is one of the most important responsibilities a system administrator must undertake. This is especially true for websites that may contain sensitive customer information and a high volume of users. So it's important for a sysadmin to take proactive measures to find and fix vulnerabilities in their websites.
One tool that can help do this is Vega Vulnerability Scanner, a free, open-source, graphical web-auditing tool developed by the security company Subgraph. This tool contains several interesting features such as a proxy scanner, but we'll be focusing on the automated security testing aspect that can help us find and validate SQL injection, cross-site scripting (XSS), inadvertently disclosed sensitive information, and many other vulnerabilities.
There are similar web application scanners to Vega. Portswigger's Burp Suite Scanner and Netsparker's Security Scanner both ofter premium vulnerability scanners but Vega's scanner can perform many of the same tasks at no cost. Vega's scanner makes finding and understanding the severity of web application vulnerabilities simple by clearly and concisely displaying useful resources with every scan.
Step 1Install Vega
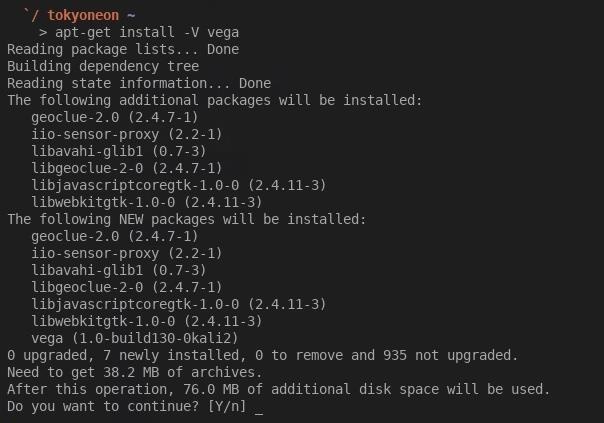
Since the Vega Vulnerability Scanner usually comes preinstalled on most versions of Kali Linux, you should be good to go if you're using a Kali system. If you're not sure whether or not your Kali setup has it already, you can run the apt-get command seen below in a terminal. You'll get a message saying it's already installed if you do have it already, and if not, it will install it for you.
apt-get update && apt-get install vega
If you're using the BlackArch penetration distribution, you can install the Vega Vulnerability Scanner with the below command. BlackArch doesn't use the APTpackage manager, so we'll use Pacman. I won't be going over any other details in the following steps that cover using BlackArch, but it's a similar process, so it shouldn't be too hard for you to follow along.
pacman -S vega
Step 2Start Vega
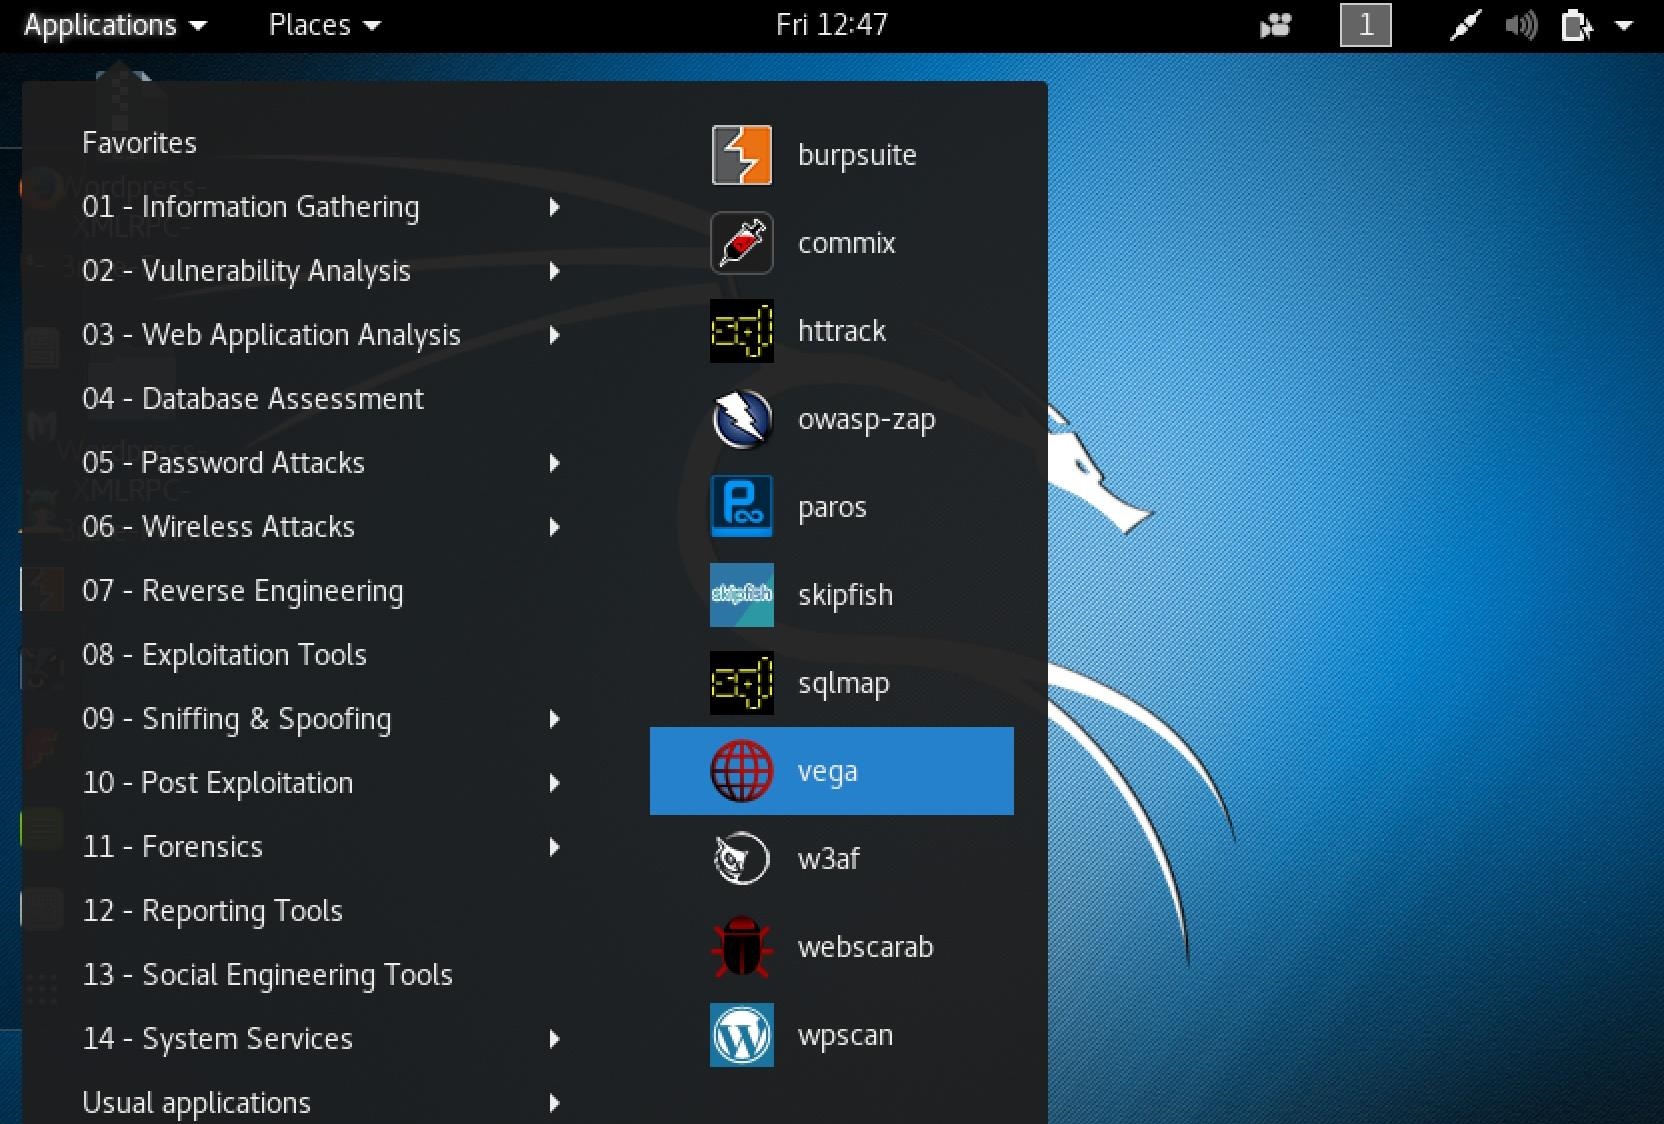
In Kali Linux, tools are automatically sorted into categories, so click on "Applications," then hover over the "Web Application Analysis" category, and click on "Vega." Depending on if you're using something like XFCE, a lightweight version of Kali, the Applications menu may look a bit different. You could also just search for "Vega" from the "Show Applications" screen.
Step 3Configure Vega
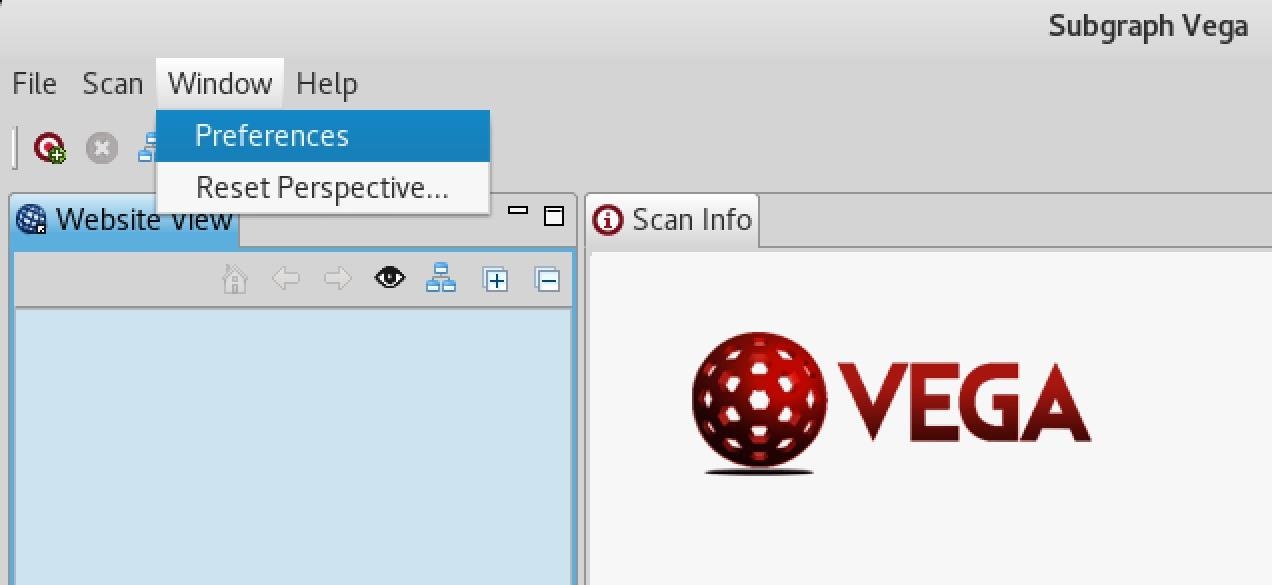
After starting an application for the first time, I like to view the available preferences and options. In the top-left corner, click on the "Window" menu, then view the "Preferences," which I'll walk you through in the next two steps.
Proxy Vega HTTP Requests (Optional)
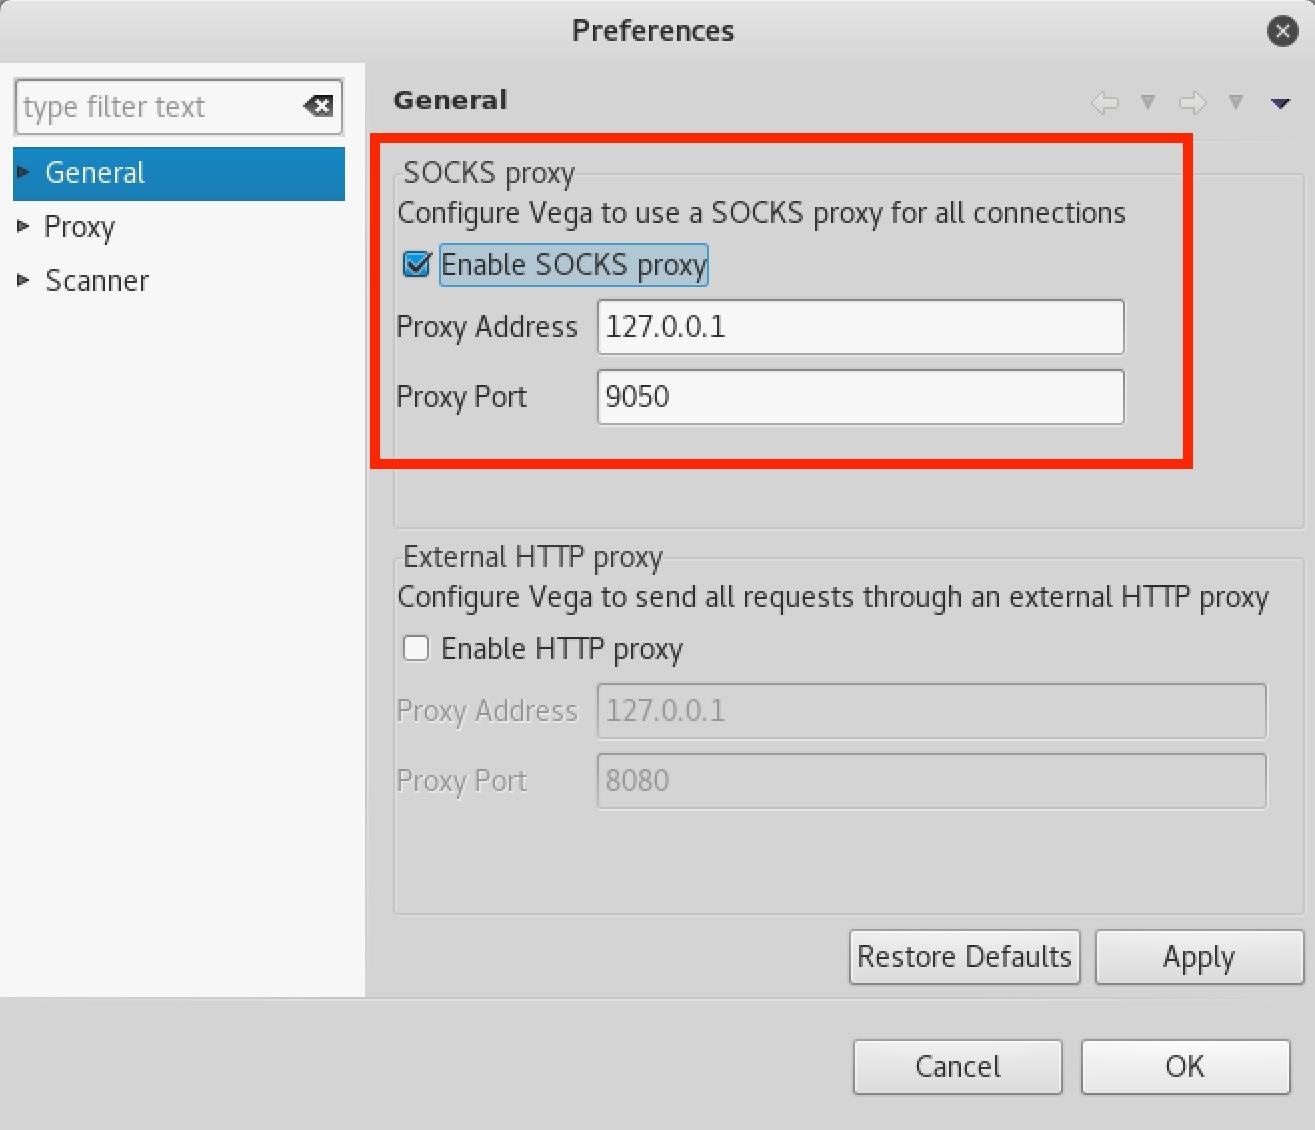
If you prefer to anonymize your Vega scans and proxy all connections, check the "Enable SOCKS proxy" option under General, and enter a proxy address and port. If you're using Tor, enter the default Tor address and port (127.0.0.1:9050). This will help conceal the origin of your scans. Otherwise, if you're using a free or premium proxy service, choose the address and port you prefer.
Use Tor's User-Agent (Optional)
If you decide to proxy Vega scans over Tor, you may also consider changing Vega's user-agent to the Tor Browser user-agent. This will help you access some (but not all) websites that block Tor HTTP requests.
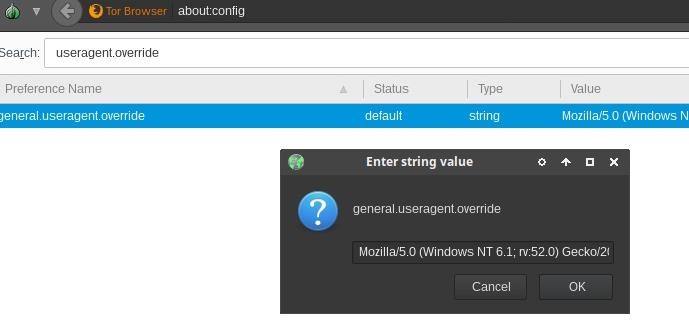
To modify the Vega user-agent, click on the "Scanner" category and enter the Tor Browser user-agent next to User-Agent. Then click "Apply" and "OK" to save the changes. Below is the current Tor Browser user-agent as of Feb. 2018.
Mozilla/5.0 (Windows NT 6.1; rv:52.0) Gecko/20100101 Firefox/52.0
The Tor Browser user-agent will change with every major Tor Browser update. To find the latest user-agent, open an up-to-date Tor Browser and enter about:configinto the URL bar. If you see a warning popup, select "I accept the risk," then type useragent.override in the Search bar.
Double-clicking the entry that shows up will prompt a popup and allow you to copy the user-agent string. Alternatively, you can also right-click and select "Copy" on the value.
Moderate HTTP Requests (Optional)
Another thing in the Scanner menu you may want to modify is the Maximum number of requests per second to send option. By default, the software is set to 25 requests per second.
Depending on the scenario, this might be too many or too few requests per second. Assuming you have permission to scan a website with Vega, ten requests per second is probably a good place to start. With sites you own, 100 requests per second might be more appropriate. It's entirely up to you.
You won't notice much increase in processing power using more requests per second, so it's safe to set that number to something high. Don't worry; Vega isn't a DDoS tool. Your internet bandwidth and the bandwidth of the website will automatically throttle the requests.
That's about it for Vega's preferences. The Listener settings in "Proxy" are preferences unrelated to the scanner. The "Debug" preferences in the Scanner section are there for Vega developers.
Step 4Scan a Website with Vega
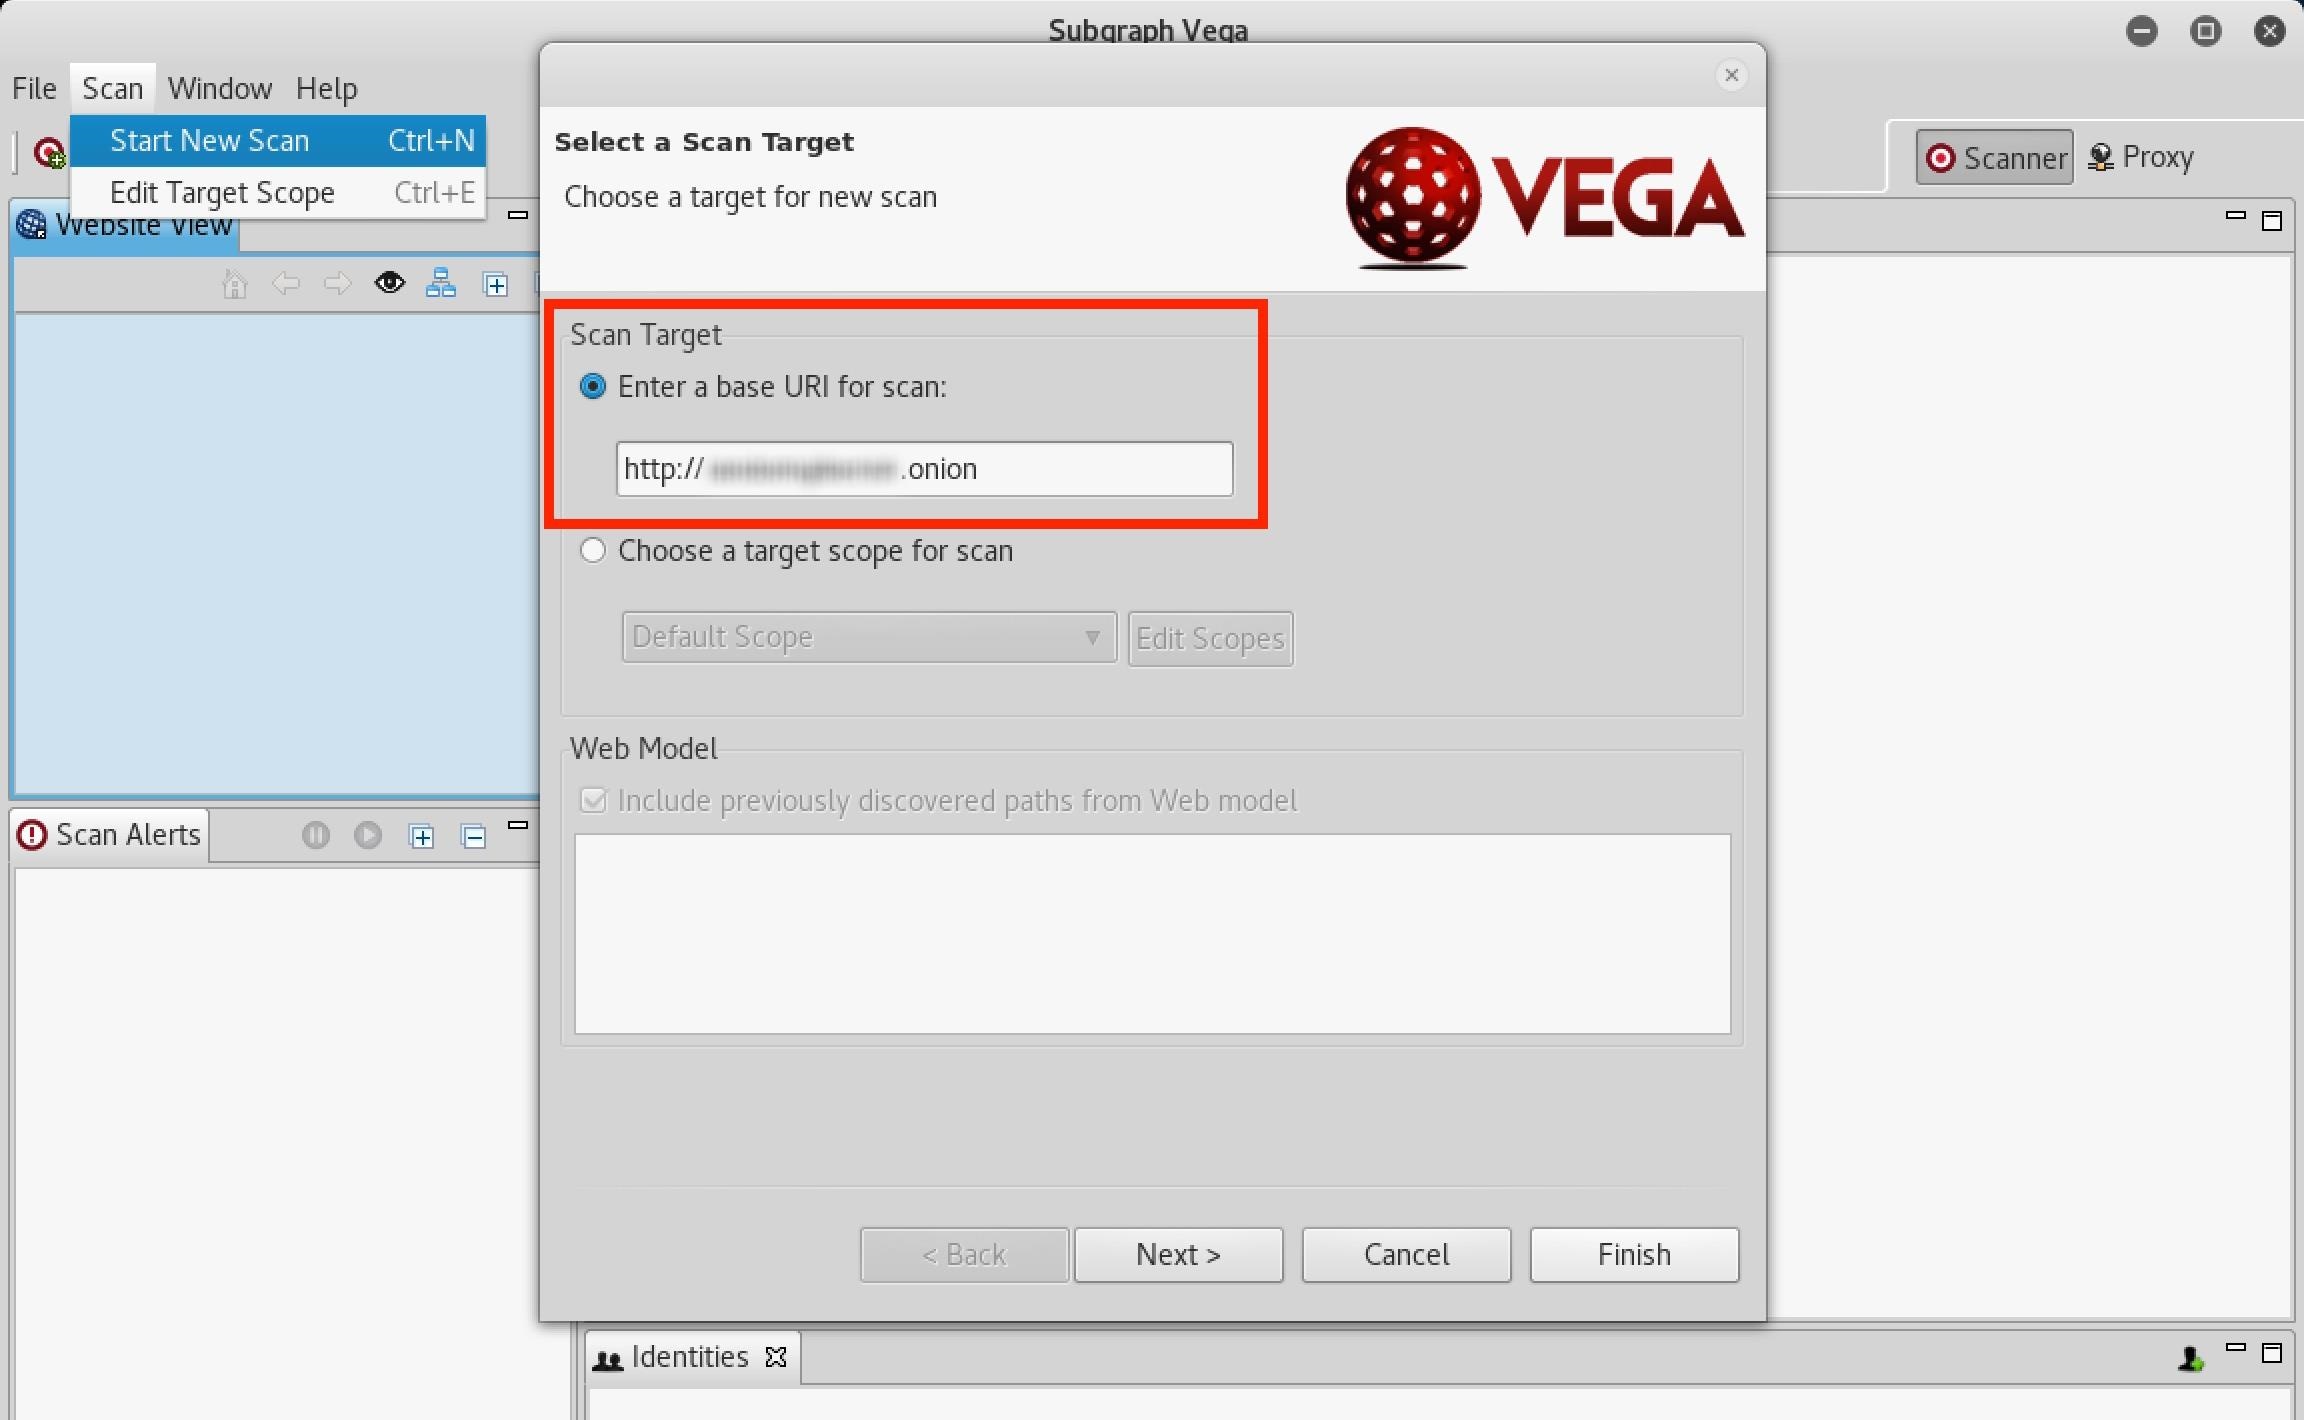
Now that we have Vega installed and configured, we're now ready to start scanning a website. To start scanning, open the "Scan" menu in the top left and click on "Start New Scan." Vega will prompt us with the Select a Scan Target window. Enter your target URL into the box under Scan Target, then hit "Next."
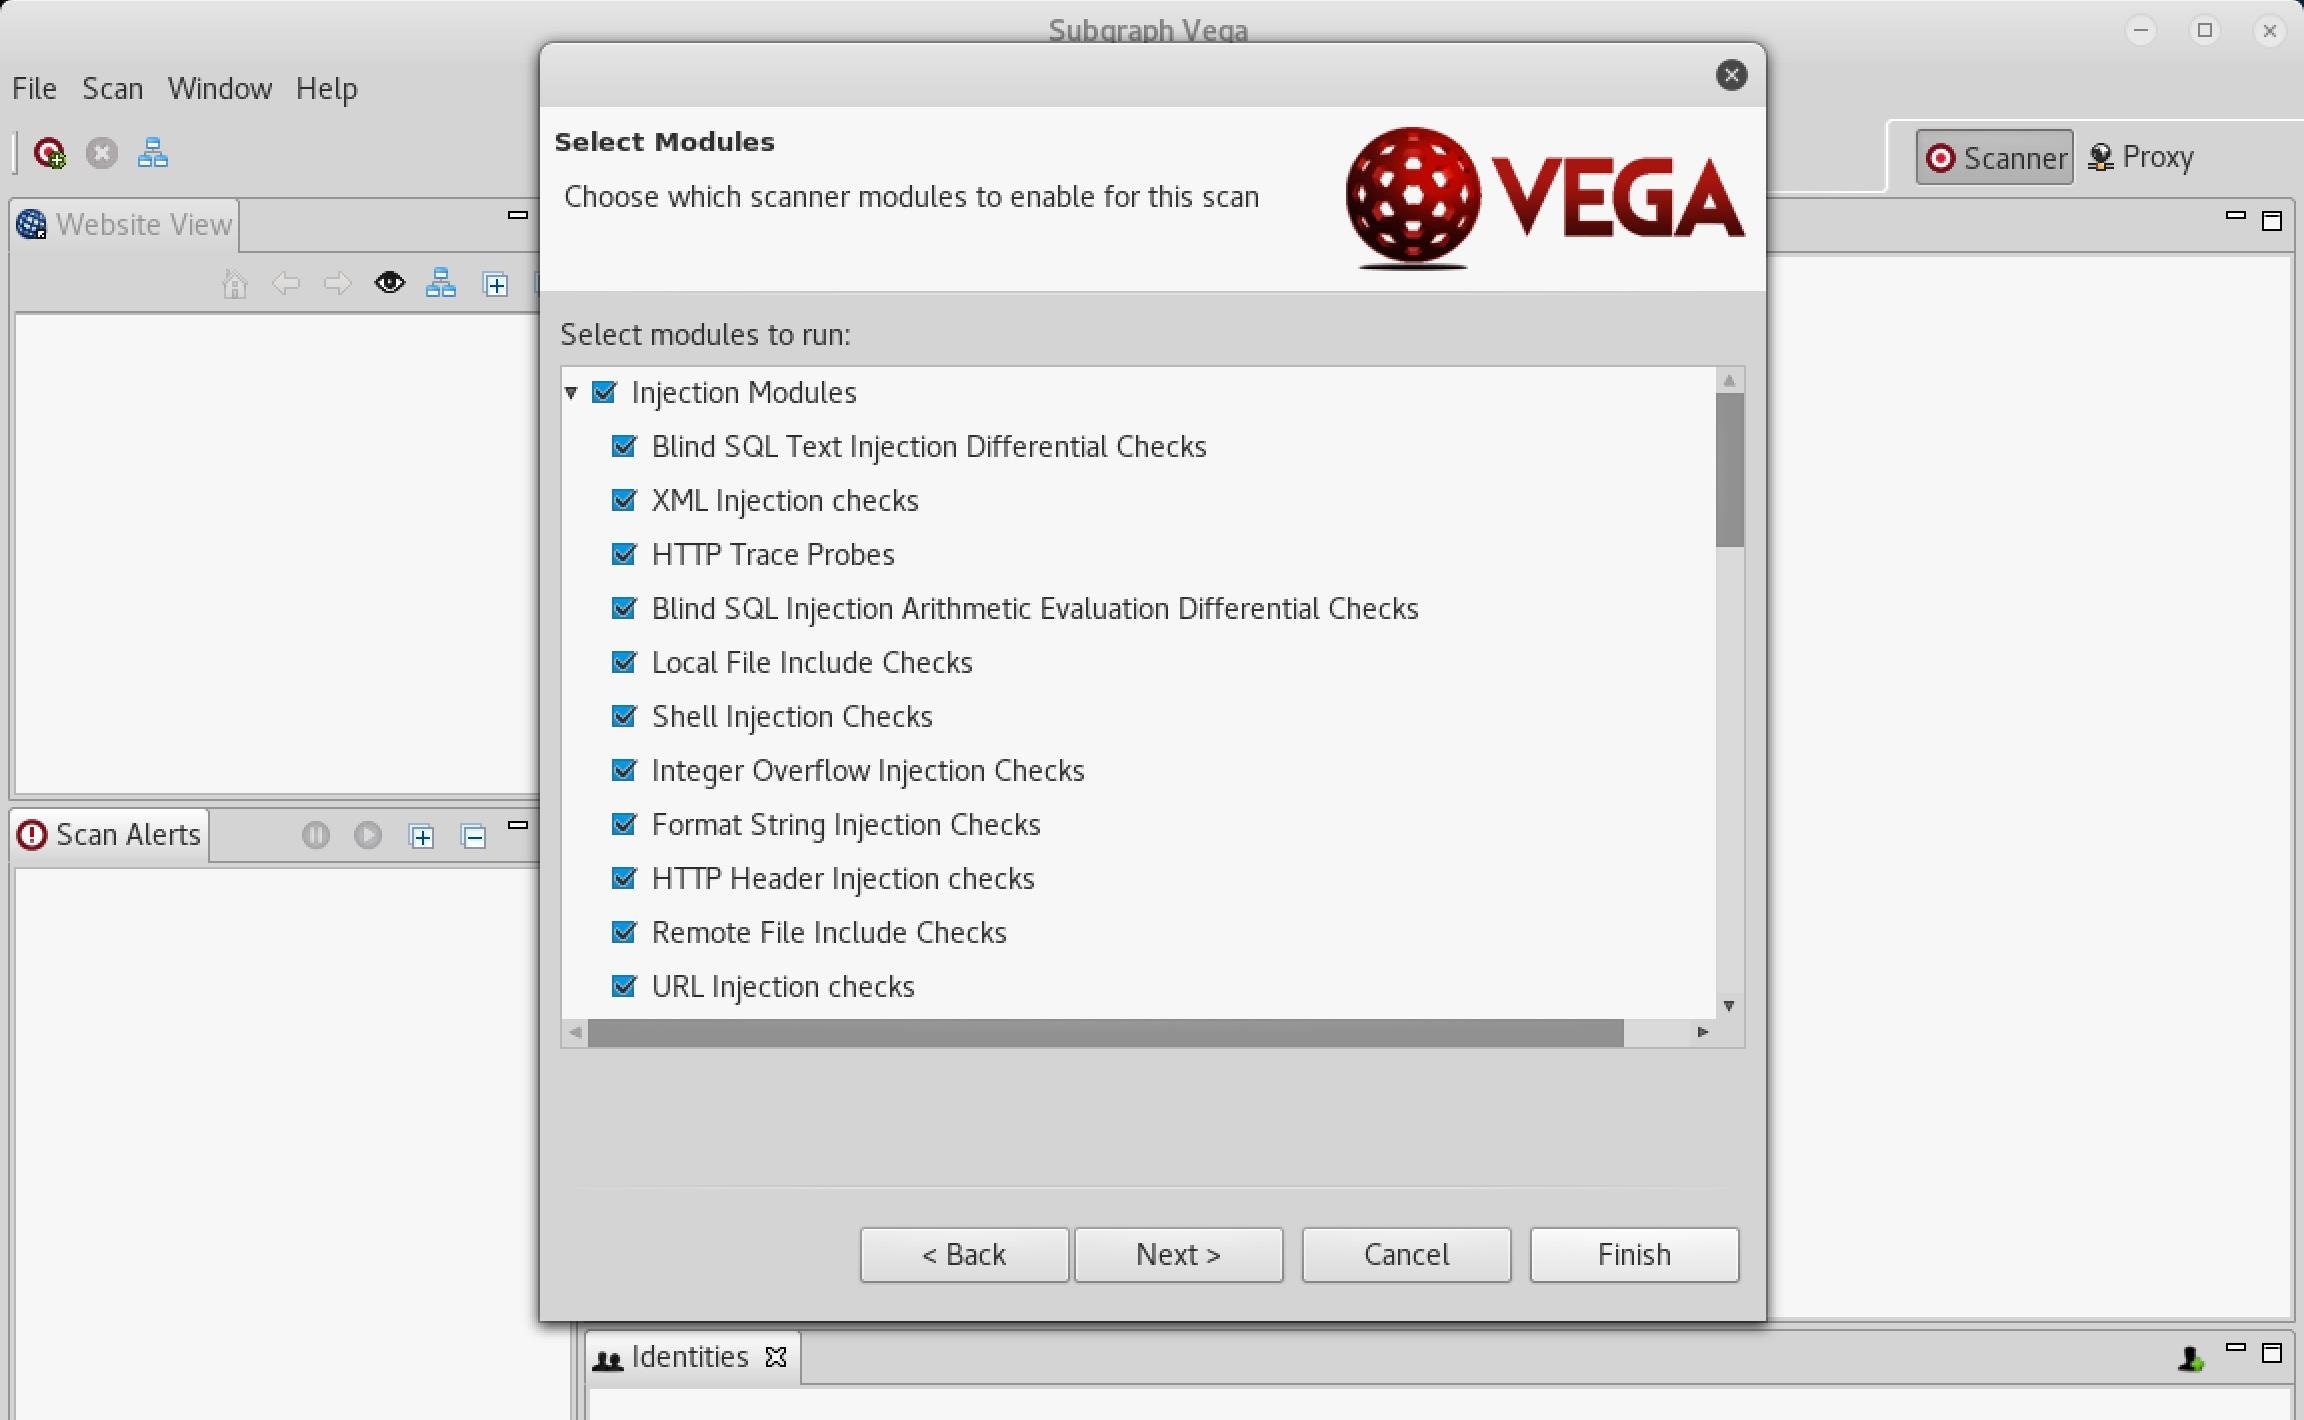
Vega has dozens of modules designed to find a wide range of common web server vulnerabilities such as SQL, XSS, and XML injection vulnerabilities. If you want to enable all of the scanner modules, just make sure all are selected, and click "Finish" to start scanning the website. Otherwise, deselect the modules you're not interested in testing first.
Note: We don't need to adjust the Authentication Options or Parameters, the next two pages in the options if you keep selecting "Next," so that's why we just select "Finish" after choosing our modules.
A scan can take anywhere from 2 minutes to 8 hours to complete depending on the size of the website and the requests per second we set earlier in the article. You'll know the scan has started when the website appears in the Scan Alerts tab and alerts begin to propagate. When the scan is done running, you'll get a report detailing any vulnerabilities found.
Step 5Interpret Vega's Alerts
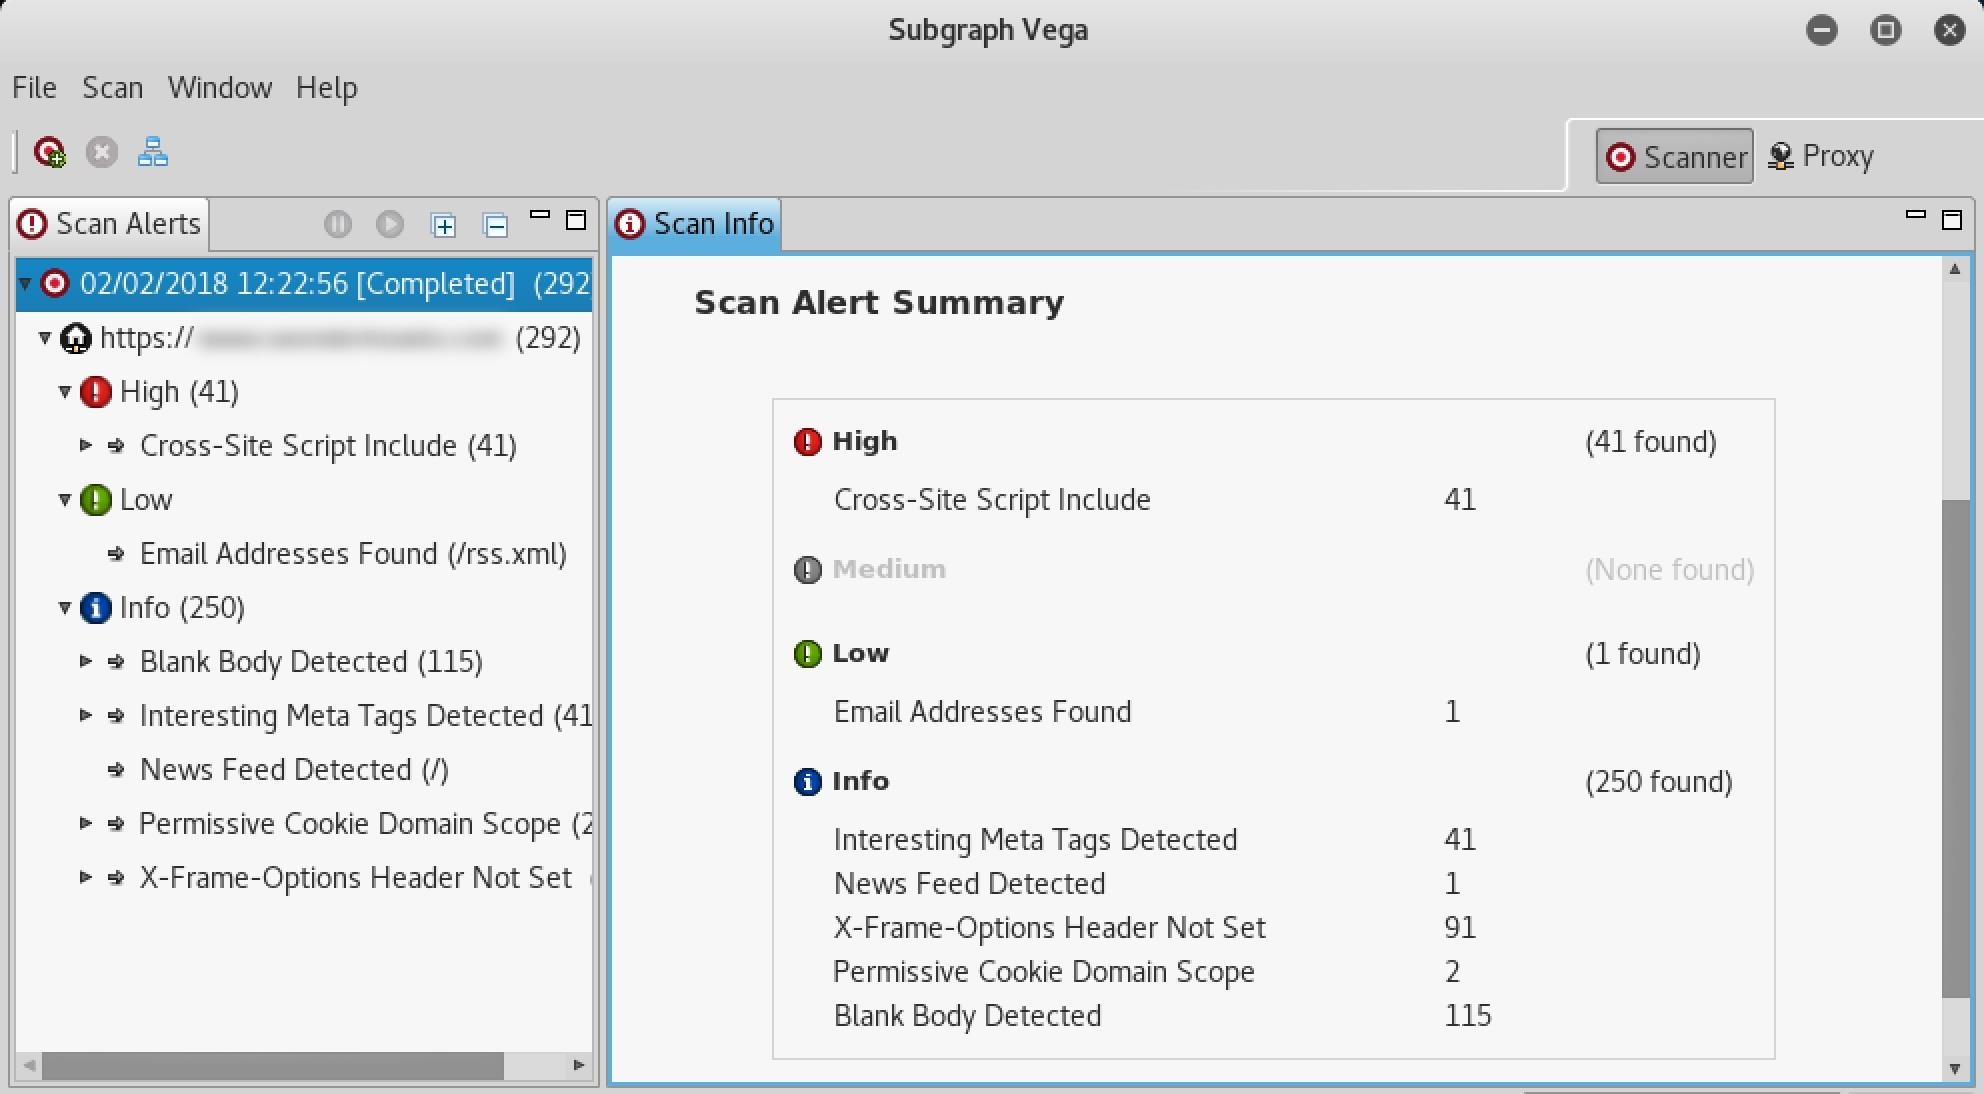
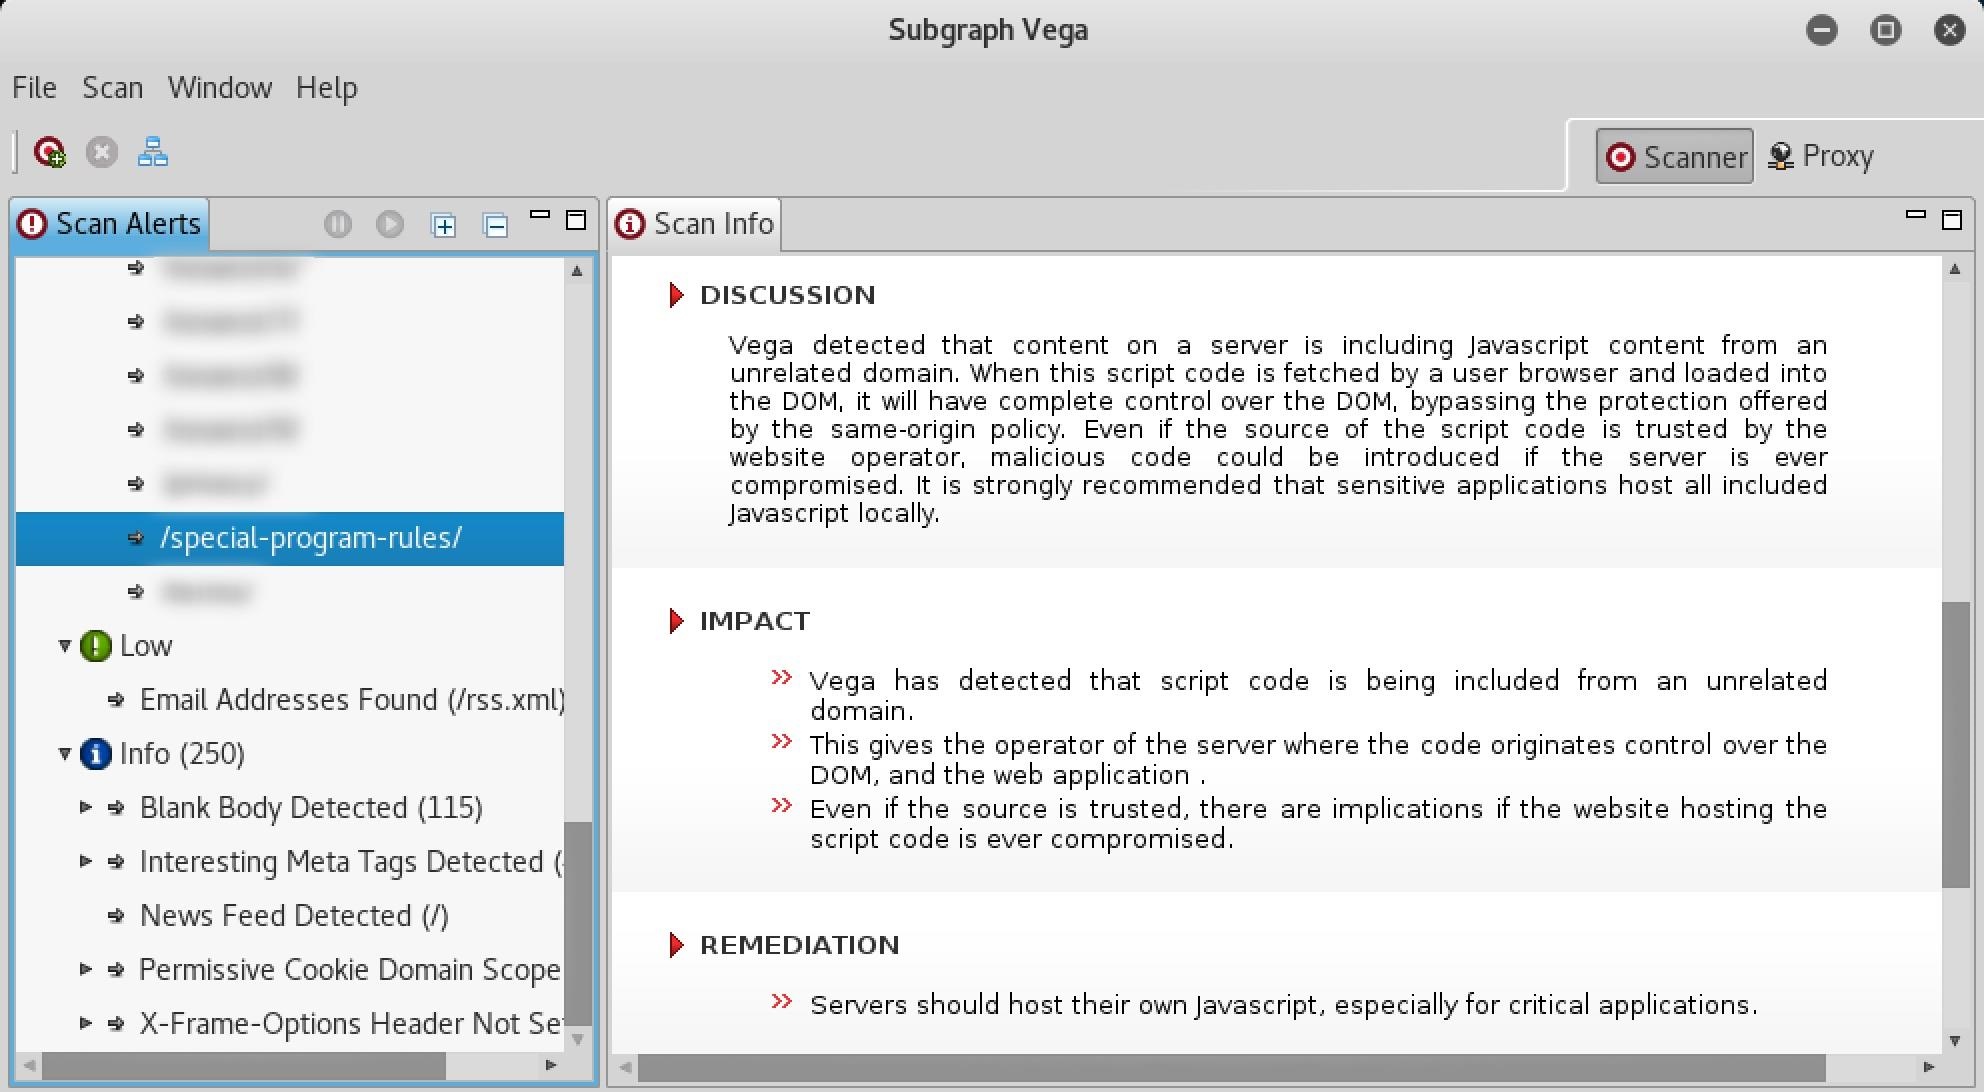
When the scan is complete, Vega will clearly and concisely display a summary of the alerts.
If Vega reports a "High" alert, don't panic. Vega's modules are sensitive and sometimes produce false positive alerts for vulnerabilities that may not actually exist. False positives aren't necessarily a bad thing. That being said, it's a good idea to comb through the report and manually investigate each alert. Think of these alerts as areas worth further investigating and not definitive indications that something needs to be fixed.
Vega does a fantastic job of explaining what each alert means, their impact on our websites, and ways to remedy the vulnerabilities. It also includes useful references that may help us better understand how to deal with the vulnerabilities.
Clicking on one of the alerts will display tons of useful information.
Vega Can Help Keep Your Website Secure
Vega is an excellent tool to help security researchers better understand web application penetration testing. Its vast selection of modules allows even novice users to dig deep into potential security risks and assess their severity to websites. Anyone interested in improving the security of their website and enhancing their web hacking skills will come to love Vega aWithstanding an attack from a motivated hacker is one of the most important responsibilities a system administrator must undertake. This is especially true for websites that may contain sensitive customer information and a high volume of users. So it's important for a sysadmin to take proactive measures to find and fix vulnerabilities in their websites.
One tool that can help do this is Vega Vulnerability Scanner, a free, open-source, graphical web-auditing tool developed by the security company Subgraph. This tool contains several interesting features such as a proxy scanner, but we'll be focusing on the automated security testing aspect that can help us find and validate SQL injection, cross-site scripting (XSS), inadvertently disclosed sensitive information, and many other vulnerabilities.
There are similar web application scanners to Vega. Portswigger's Burp Suite Scanner and Netsparker's Security Scanner both ofter premium vulnerability scanners but Vega's scanner can perform many of the same tasks at no cost. Vega's scanner makes finding and understanding the severity of web application vulnerabilities simple by clearly and concisely displaying useful resources with every scan.
Step 1Install Vega
Since the Vega Vulnerability Scanner usually comes preinstalled on most versions of Kali Linux, you should be good to go if you're using a Kali system. If you're not sure whether or not your Kali setup has it already, you can run the apt-get command seen below in a terminal. You'll get a message saying it's already installed if you do have it already, and if not, it will install it for you.
apt-get update && apt-get install vega
If you're using the BlackArch penetration distribution, you can install the Vega Vulnerability Scanner with the below command. BlackArch doesn't use the APTpackage manager, so we'll use Pacman. I won't be going over any other details in the following steps that cover using BlackArch, but it's a similar process, so it shouldn't be too hard for you to follow along.
pacman -S vega
Step 2Start Vega
In Kali Linux, tools are automatically sorted into categories, so click on "Applications," then hover over the "Web Application Analysis" category, and click on "Vega." Depending on if you're using something like XFCE, a lightweight version of Kali, the Applications menu may look a bit different. You could also just search for "Vega" from the "Show Applications" screen.
Step 3Configure Vega
After starting an application for the first time, I like to view the available preferences and options. In the top-left corner, click on the "Window" menu, then view the "Preferences," which I'll walk you through in the next two steps.
Proxy Vega HTTP Requests (Optional)
If you prefer to anonymize your Vega scans and proxy all connections, check the "Enable SOCKS proxy" option under General, and enter a proxy address and port. If you're using Tor, enter the default Tor address and port (127.0.0.1:9050). This will help conceal the origin of your scans. Otherwise, if you're using a free or premium proxy service, choose the address and port you prefer.
Use Tor's User-Agent (Optional)
If you decide to proxy Vega scans over Tor, you may also consider changing Vega's user-agent to the Tor Browser user-agent. This will help you access some (but not all) websites that block Tor HTTP requests.
To modify the Vega user-agent, click on the "Scanner" category and enter the Tor Browser user-agent next to User-Agent. Then click "Apply" and "OK" to save the changes. Below is the current Tor Browser user-agent as of Feb. 2018.
Mozilla/5.0 (Windows NT 6.1; rv:52.0) Gecko/20100101 Firefox/52.0
The Tor Browser user-agent will change with every major Tor Browser update. To find the latest user-agent, open an up-to-date Tor Browser and enter about:configinto the URL bar. If you see a warning popup, select "I accept the risk," then type useragent.override in the Search bar.
Double-clicking the entry that shows up will prompt a popup and allow you to copy the user-agent string. Alternatively, you can also right-click and select "Copy" on the value.
Moderate HTTP Requests (Optional)
Another thing in the Scanner menu you may want to modify is the Maximum number of requests per second to send option. By default, the software is set to 25 requests per second.
Depending on the scenario, this might be too many or too few requests per second. Assuming you have permission to scan a website with Vega, ten requests per second is probably a good place to start. With sites you own, 100 requests per second might be more appropriate. It's entirely up to you.
You won't notice much increase in processing power using more requests per second, so it's safe to set that number to something high. Don't worry; Vega isn't a DDoS tool. Your internet bandwidth and the bandwidth of the website will automatically throttle the requests.
That's about it for Vega's preferences. The Listener settings in "Proxy" are preferences unrelated to the scanner. The "Debug" preferences in the Scanner section are there for Vega developers.
Step 4Scan a Website with Vega
Now that we have Vega installed and configured, we're now ready to start scanning a website. To start scanning, open the "Scan" menu in the top left and click on "Start New Scan." Vega will prompt us with the Select a Scan Target window. Enter your target URL into the box under Scan Target, then hit "Next."
Vega has dozens of modules designed to find a wide range of common web server vulnerabilities such as SQL, XSS, and XML injection vulnerabilities. If you want to enable all of the scanner modules, just make sure all are selected, and click "Finish" to start scanning the website. Otherwise, deselect the modules you're not interested in testing first.
Note: We don't need to adjust the Authentication Options or Parameters, the next two pages in the options if you keep selecting "Next," so that's why we just select "Finish" after choosing our modules.
A scan can take anywhere from 2 minutes to 8 hours to complete depending on the size of the website and the requests per second we set earlier in the article. You'll know the scan has started when the website appears in the Scan Alerts tab and alerts begin to propagate. When the scan is done running, you'll get a report detailing any vulnerabilities found.
Step 5Interpret Vega's Alerts
When the scan is complete, Vega will clearly and concisely display a summary of the alerts.
If Vega reports a "High" alert, don't panic. Vega's modules are sensitive and sometimes produce false positive alerts for vulnerabilities that may not actually exist. False positives aren't necessarily a bad thing. That being said, it's a good idea to comb through the report and manually investigate each alert. Think of these alerts as areas worth further investigating and not definitive indications that something needs to be fixed.
Vega does a fantastic job of explaining what each alert means, their impact on our websites, and ways to remedy the vulnerabilities. It also includes useful references that may help us better understand how to deal with the vulnerabilities.
Clicking on one of the alerts will display tons of useful information.
Vega Can Help Keep Your Website Secure
Vega is an excellent tool to help security researchers better understand web application penetration testing. Its vast selection of modules allows even novice users to dig deep into potential security risks and assess their severity to websites. Anyone interested in improving the security of their website and enhancing their web hacking skills will come to love Vega and its ease of use, or at least, I hope so.
Earlier, we had reported that the National Security Agency (NSA) was going to open source Ghidra. It was spotted from the senior NSA advisor, Robert Joyce’s session description on the official RSA conference website.
In case the text in the image isn’t properly visible, let me quote the description here:
NSA has developed a software reverse engineering framework known as GHIDRA, which will be demonstrated for the first time at RSAC 2019. An interactive GUI capability enables reverse engineers to leverage an integrated set of features that run on a variety of platforms including Windows, Mac OS, and Linux and supports a variety of processor instruction sets. The GHISDRA platform includes all the features expected in high-end commercial tools, with new and expanded functionality NSA uniquely developed. and will be released for free public use at RSA.
The speculations have turned to be true as Ghidra is now available for the public.
What is Ghidra?
Ghidra is a software reverse engineering framework developed by NSA that is in use by the agency for more than a decade.
Basically, a software reverse engineering tool helps to dig up the source code of a proprietary program which further gives you the ability to detect virus threats or potential bugs. You should read how reverse engineering works to know more.
The tool is is written in Java and quite a few people compared it to high-end commercial reverse engineering tools available like IDA.
A Reddit thread involves more detailed discussion where you will find some ex-employees giving good amount of details before the availability of the tool.
Ghidra was a secret tool, how do we know about it?
NSA is definitely targeting the open source community to help improve their tool while also reducing their effort to maintain this tool. This way the tool can remain free and the open source community can help improve GHIDRA as well.
If you want to contribute to the project, please read the guideline.
How to get Ghidra
Ghidra is a Java-based application and is available for Linux, Windows and macOS.
You can download it for free from its official website. It’s around 270MB in size.
A free and open source Ghidra would definitely help a lot of researchers and students and on the other side – the competitors will be forced to adjust their pricing.
What are your thoughts about it? Is it a good thing? What do you think about the tool going open source? Let us know what you think in the comments below.